Nail art is a form of grooming! It is not just done for special occasions or events but every time is a good time for nail art.

Whether you are in the mood for self-pampering or you wish to groom yourself for an important work meeting or vacation, nail art gives a finishing touch to your overall look. In this article, we shall be discussing some common green nail art ideas along with sharing tips associated with getting a flawless design done at home. Let's begin, then.
What is the need to apply dehydrating nail primer?
Often you have heard that nail primers are applied during nail art but do you know the reason behind the usage of one? Well, let us clarify that for you! Once tips are applied and then shaped according to the desire of the individual, you need to make your acrylic tips look simply extraordinary. So make sure you have all the acrylic ingredients in hand, ready to go.
The fumes of acrylic substances are strong and hence you must be working in a well-ventilated space. Dehydrating the natural nail is the first thing that you need to do. Then you need to prime your nails. Extending from the cuticle to the tip of the nails, you need to make every stroke. This way the acrylic mixture will adhere well to the surface of the nails.
When should you coat your nails with the acrylic mixture?
You must be having an acrylic nail brush, don't you? You are expected to dip the brush in the acrylic monomer. Tap on the opposite side so you do not end up over-saturating the brush. Then the brush is dipped into the nail powder. A perfect bead of acrylic will be formed as a result of it.
Drippy and dry ones are not something you are looking for and this can be avoided with the usage of this technique here. Smooth out the edge when you are applying the coating. Every time you apply the coat, even out the edges. This will prevent the formation of clumps. If you want you can finish off with a shiny top coat!
How long should you let the acrylic to dry off
Even if you have accomplished the job with perfection, if you don't give time to dry off the nail coat then the entire work goes down the drain. It is wise to say that the acrylic is temperature-sensitive. Hence you need to be careful. The cold temperature will make your beads set slower. The hotter the environment, the faster the paint will set. Allow the temperature to remain between 68-72°F ideally.
However, when you are doing this DIY for the first time then you will observe that cold temperature is ideal for working as a first timer. If you have a heater in the house then you can use it to allow the acrylic to dry off.
Is shaping required finally
Once the acrylic is applied and it has got its time to dry up, you need to touch up the edges that have gone a little rough. Since by this time you have opted for the desired shape for your nails, you can now simply file it from all sides. Do not forget the tips too. Finally, your acrylic nails will be ready. So no matter what shade you are opting for, whether green or some other, you must shape your follow the steps carefully, especially if you are a beginner and not quite aware of how to get the thing right.
How to remove the nails
The process of removal of nails is pretty easy as long as you know the right way to do it! This is where most of us are likely to go wrong. In the end, you don't want it to be a painful procedure, do you? Hence you must always follow the right steps and get it removed the way we are about to share with you. The simplest way to get them removed is to allow the natural nail below to grow off and then you can keep filing and chipping off the acrylic until none is left. However, under no dire need, should you allow your nails to be plucked or pulled off.
First of all, you should begin with the removal of nail embellishments like stones, pearls, jewelry, and so on. The unwanted free or irregular edges can be filed as well. Try to file off the acrylic nail, as much as possible. However, do not go too close to your real nail or you may hurt yourself. You may also soak the nails in an acetone-filled bowl for ten minutes. Then scrape it off with a cuticle pusher.
Green Nail Art Ideas & Tips to Create a Flawless Manicure


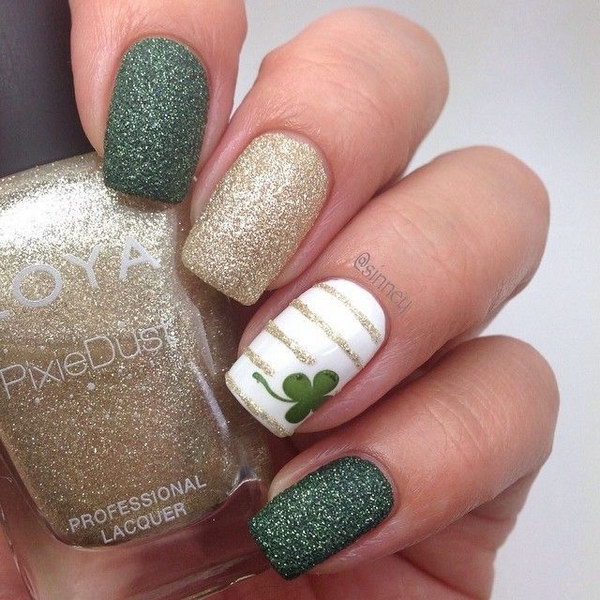


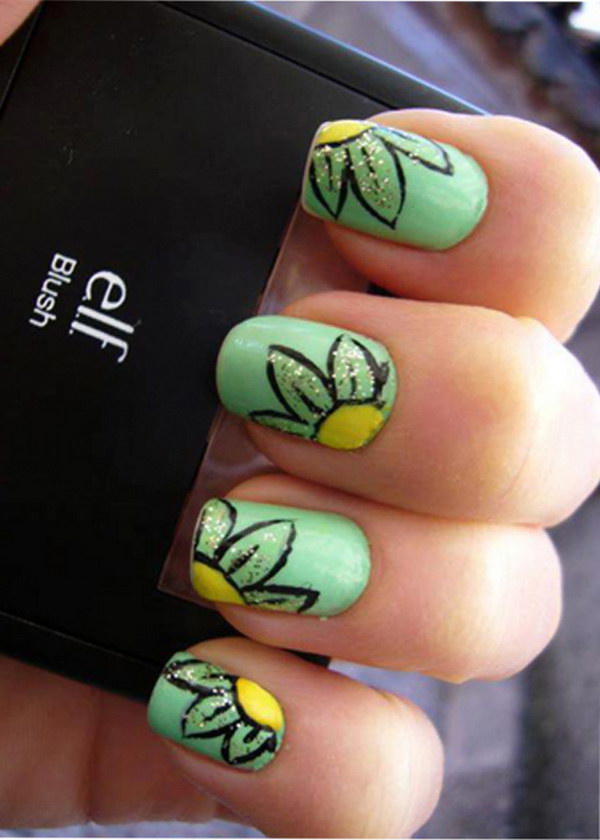


Green Nail Art Designs Photo Collected via pinterest.com
Leave a Reply