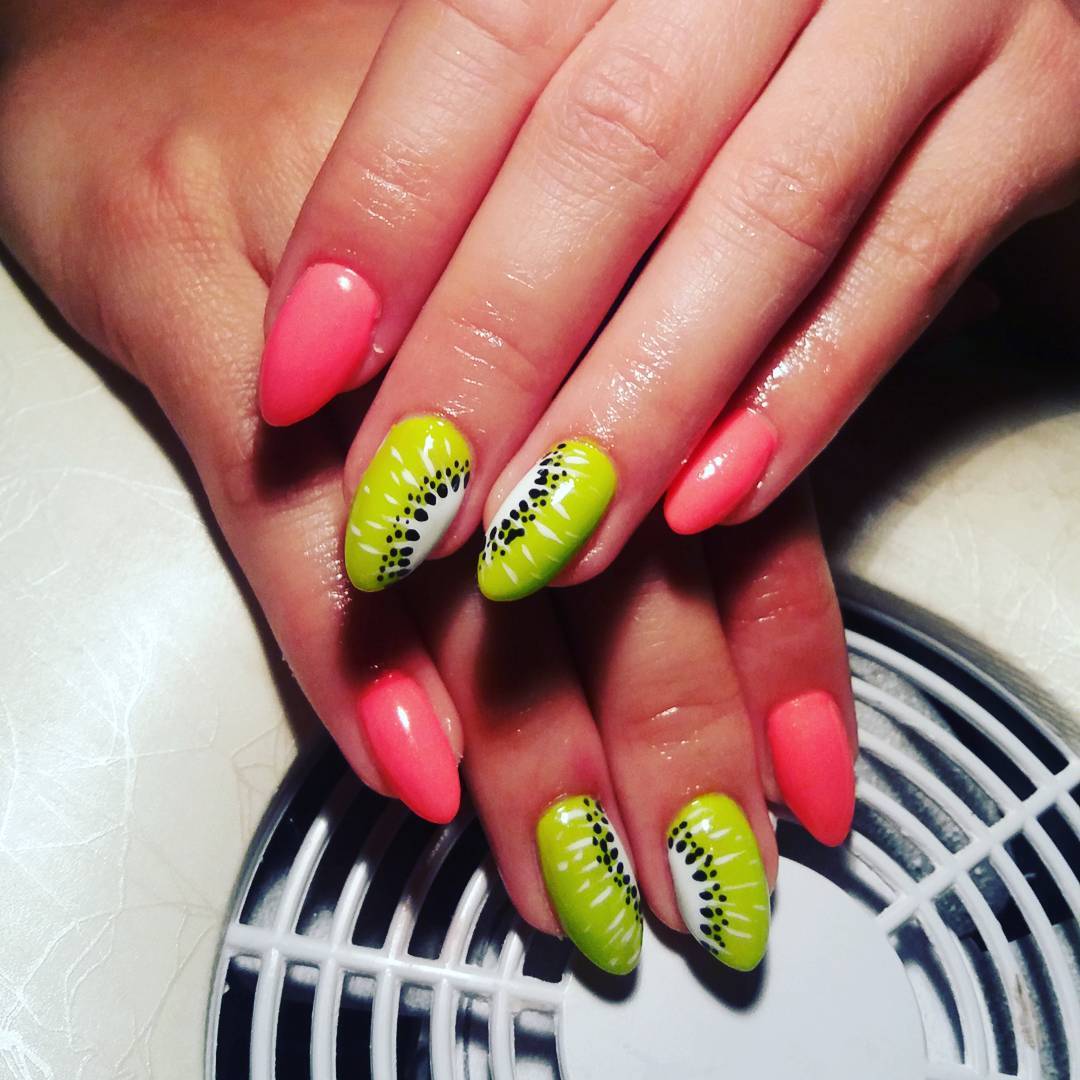
The thought of summer brings into our mind the idea of vibrant and juicy fruits! Mangoes, peaches, pears and so much more. However, always heading to the salon for an expensive nail art treatment may not be something feasible for everyone all the time. Plus, it is always a fun affair to engage in creative fruit nail art ideas. If you are making fruit figurines on the nails for the first time and need some help then you must go through the easy steps and guidelines we have for you.

Begin with cleaning the nails
Well, this is true no matter what kind of nail art you wish to do. Unless you clean the nails properly and remove the previously applied nail paint, it is not possible to begin with the new design. Even if your nail bed is clear, use a cotton swab dipped in acetone to clean around the edges to remove the dirt and dust or strap polish that accumulated on the sides.
Moisturizing the skin
Often nails and the surrounding cuticular area can go dry due to repeated nail art treatment. If you try to push back the cuticles at this stage, the dried skin may peel off and end up bleeding! Sometimes painful infections may also show up! Since you don't want your nail art treatment to be so messy and ugly, it is best to moisturize your skin before you gently push back the cuticle. This helps to create more surface area for applying the nail polish.
Why do you need to buff your nails?
Often you will hear that buffing can peel off the surface of your nails and deteriorate their quality. Contrary to popular belief, buffing is an important step that should not be skipped. It gives better anchorage to the base coat and the polish to adhere to the surface of the nails. However, do not go overboard when you are buffing your nails.
What are the materials you will need for acquiring fruit nails
Before you begin to do the designing, make sure you have these couple of things in your nail art toolkit.
- All sorts of vibrant nail colors.
- Nail remover( acetone)
- A base coat.
- Cotton earbud.
- Paintbrush
- Toothpick
- Cotton/ tissue paper
- Top coat.
Apply the colorful polishes
You can choose a neutral shade for the base coat! One to two layers are enough. Mostly a light shade is chosen because the fruits after designing should stand out. Allow the base coat to dry off before you go ahead and begin with the creation of fruity nails.
Make fruity designs
There are so many different kinds of fruits that you can design on your nails. You can choose to stick to one kind of fruit or make different fruits on different nails. We would prefer the latter to showcase creativity and dynamism.
For example, if you are making the kiwi design then make uneven black dots on the surface of green nails. Use a fine brush for this purpose or the blunt end of your toothpick.
But if you are designing a strawberry then only place black dots on the green portion of your leaf and leave the rest of the nail enamel to be painted red.
In the case of watermelon, you must have painted your nails in bi-colour shades of green and red! Make sure you use your brush to outline the two with black polish. You can also make a few longitudinal dots on the red portion to resemble the seeds as well. The finer you design, the more detailed it looks and gives you a salon-like beauty.
Finishing touch
Do not be hasty with the nail art. If you are making one kind of design for consistency then good, your effort will be less but if you are getting all creative with the designs and wish to have different fruit patterns on different nails, then don't be impatient! Finish one nail at a time. Contrasting the shades between each finger is also essential so that your nails look attractive. Maybe, you can have strawberries beside kiwi and watermelon next to bananas.
As a finishing touch, you cannot forget the top coat. Matte topcoat is not suitable for fruity nails. They are expected to be glossy and reflective. Hence you should use a clear top coat for your nails. This will take a few minutes to dry up.
In case you are using gel polish, cure your nails under UV light. Once done, we can guarantee you that you will be bewitched by its look. We hope that this article was useful for you to learn the basics of designing fruity nails. Try it today.
Fruit Nail Art Ideas To Refresh Your Summer


Best Fruit Nail Art Photos Collected via instagram.com
Read also:

Leave a Reply