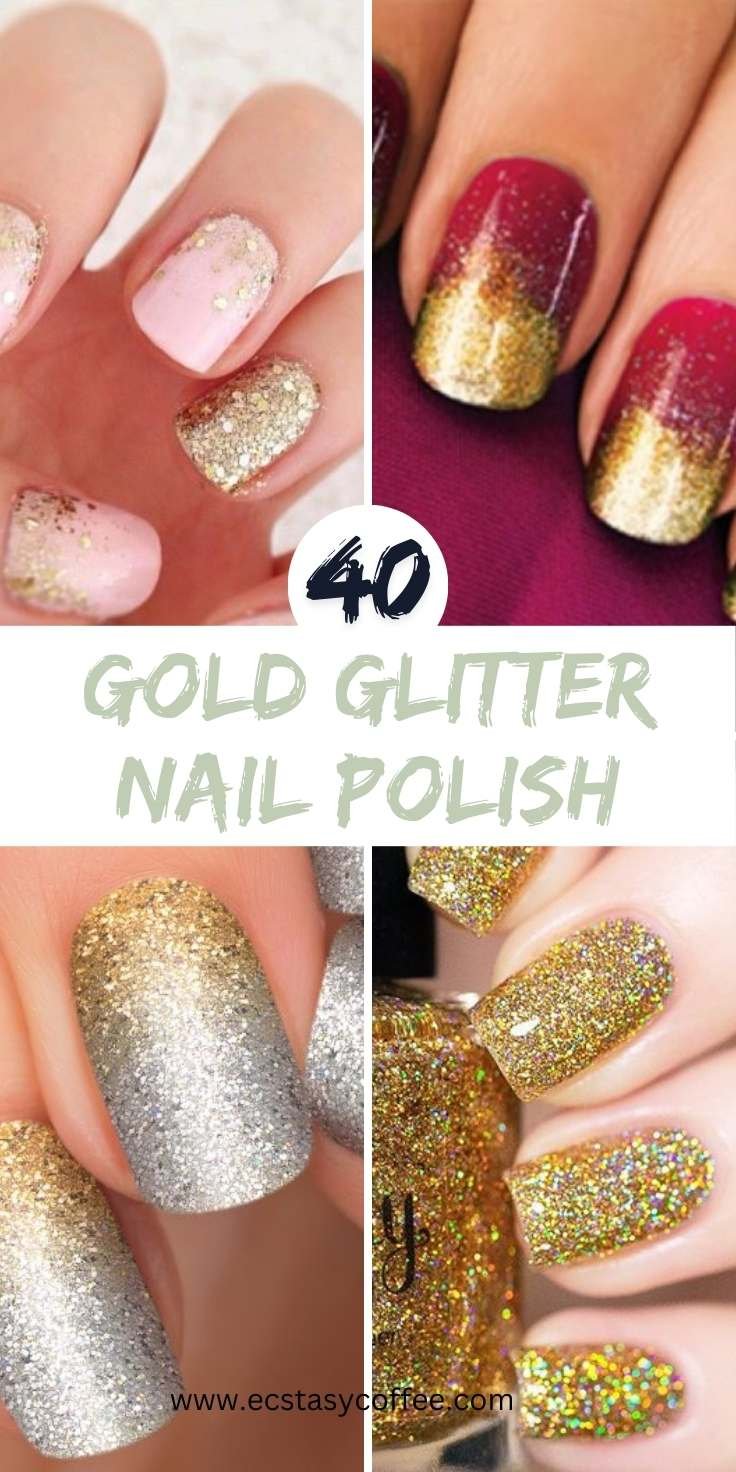
You would be lying if you said that you are not fond of glitter nails! After all, these nails are so charming and elegant! Whether it is a house party or you are heading out somewhere nice for dinner, glitter nails are just like the cherries on your cake top.

If you want your nails to look extra beautiful and extra attractive, then the effort also needs to be extra. However, you don't need to spend extra bucks from your pocket. Having said so, here are some tips that you should keep in mind while you get ready to acquire gorgeous glittery nails at home.
What are the items you would need for golden glittery nails
Of course, you should not be frantically looking for supplies in the middle of the process and hence they must be collected and kept in hand from before. Check out the list so you can collect them before the beginning of the process.
- A base coat needs to be arranged.
- Liquid latex( this is optional, based on availability).
- Your favourite glitter polish( preferably, golden here)
- Top coat
- A make-up sponge.
What are the steps for the application of golden glitter nail art?
Begin with cleaning your nails! Make sure there is no stray nail polish left on the surface of the nails from the previous treatment! The edges should be also cleaned to remove any dust or dirt particles that are present around the corners. Once you have properly cleaned the nails, you can apply the base coat to the surface. One to two layers of clear base coat is good enough for the nails. This acts as a layer of protection between the nails and the chemical gel that you are about to apply. The utility of the base coat is to prevent any staining from appearing on the surface.
Following that, you can line your nails with liquid latex. This way the nail paint will not extend up to the skin. Now you may use the glitter nail polish that you have chosen. Apply it on the edge of a soft sponge. Now slowly dab the nail with the sponge, so that the glitter impression is created on the nail bed. This is where the actual trick lies. The utility of the sponge is to soak up extra nail polish so that only the sticky glitter is left behind. This creates a dense and prominent look on the skin. After it is done, you can remove the latex which by now had toughened up. And finally, you can finish it off with a top coat!
Allow the glitter to dry off first before you pull the strokes of the clear top coat. This gives your nails a sense of glimmer and gloss at the same time.
Golden nails are suited for parties, events, weddings, meets and so much more. Once you are done, no one will be able to guess whether the nails are done at a salon or home.
How to do DIY glitter nail art
Getting nail art is easy at home these days with these simple DIY techniques! Here we came across one and wanted to share it with you. So read on to find out how to get your nails ready to shimmer with glitter. Begin with cleaning your nails and then trimming from all the sides to acquire the right size. Now clean your nails with nail polish even if it looks clean on the front face. There can be dirt and dust particles on the surface that need to be removed to prevent any form of infection. Then you can apply the base coat and the base paint to your nails.
To create patterns, you can cover a block or portion of your nails where you don't want the design! After that, you can sprinkle glitter from the top.
After the pattern has been done, you can dust off the extra glitter that is lying loose on the surface. More than one shade of glitter can be used for this purpose to create a contrasting beauty. However, since we are talking about golden glitters, they need to, of course, create a contrast with golden! For example, black goes well with it. Allow the glitter to completely dry off and adhere to the surface before you dust the excess off. And finally, you can seal the surface with a top coat. Adding glitter to your nails can make them appear bumpy but with the transparent top coat, you can settle it down.
With that, we feel we have shared more or less all the information regarding the idea of doing golden glitter nail art. Pick the shade that you would prefer and get started.
Golden Glitter Nail Art for All Occasions: Tips & Tricks
Gold Glitter Nail Polish Art Photos Collected via pinterest.com
Read also:


Leave a Reply